Toyota 3L Hiace Lower Radiator Hose 16572-54330
Oem Toyota Lower radiator hose specifically for the 3l Hiace Applications. This is a factory hose and is
for the Toyota 3L Hiace applications only.
Fitments:
Model Dates: Models: 08/1989-07/1993 LH107G-JRMES
08/1989-07/1993 LH107G-JRMGS
08/1989-07/1993 LH107G-JRPES
08/1989-07/1993 LH107G-JRPGS
10/1990-07/1993 LH107W-MFPQS
08/1989-07/1998 LH109V-RRMDS
08/1989-04/1992 LH109V-RRMNS
08/1989-07/1998 LH109V-SRMDS
08/1989-07/1996 LH109V-SRMNS
10/1990-07/1993 LH117G-GHMDS
08/1995-07/1998 LH119V-RBMBS
08/1995-07/1998 LH119V-RBPBS
08/1989-07/1998 LH119V-RHMDS
08/1989-07/1998 LH119V-RHMES
08/1993-07/1998 LH119V-RHPDS
08/1989-07/1998 LH119V-RRMDS
08/1989-07/1998 LH119V-RRMES
08/1989-07/1996 LH119V-RRMNS
08/1993-07/1998 LH119V-RRPDS
08/1989-07/1998 LH119V-RRPES
08/1989-07/1998 LH119V-SRMDS
08/1989-07/1996 LH119V-SRMNS
08/1996-07/1998 LH119V-SRPDS
08/1989-07/1998 LH129V-ERMDS
08/1993-07/1998 LH129V-ERPDS
08/1989-07/1993 LH108L-SBMRSW
08/1989-07/1993 LH118L-RGMDSW
08/1993-07/1995 LH118L-SBMRSW
Bell Housing/ Flywheel/ clutch installation
FAILURE TO FOLLOW PROPER INSTALLATION OR BREAK-IN PROCEDURES WILL VOID ANY WARRANTY
Congratulations on your purchase on your new bell housing, flywheel, clutch kit. This kit is designed to be installed in 1uz swapped rigs 1989 thru 1995 Toyota pickups and 4runners. These instructions are designed to guide you on the installation process, not be an end all of what is required for a successful installation. Remember that an engine swapped rig is designed by you so adjustments and modifications may be necessary based on your vehicle, or installation of other products. If you have questions along the way please feel free to contact us and we will do our best to help you thru the installation process.
We stand behind what we sell. We warranty our in house products for 30 days from date of purchase against defects in materials or workmanship prior to installation. All products we carry and sell that are from outside sources will carry the warranty that those manufactures supply. We do not warranty any product from willful neglect or abuse and there are no refunds on electrical parts. The consumer will need to request a return authorization number from us prior to returning any product. Any products returned will need to be inspected by us. Upon our inspection if we find a defect we will either repair or replace the part at our discretion. All returned items must be in new condition and are subject to inspection. If you have a problem with any products we sell, please feel free to contact us and we will do our best to get you taken care of and back out enjoying your Toy again!
Product and Application Waiver All products sold by North West Toy’s, LLC are sold for off-road use only. Any other use or application is the responsibility of the purchaser and/or user. Rock crawling and off-road driving is an inherently dangerous activity. Some modifications will adversely affect the on-road handling characteristics of your vehicle. Some modifications and installation of certain after-market parts may under certain circumstances void your original dealer warranty. Modifications of your vehicle may create dangerous conditions, which could cause serious bodily injury or death. Buyers and users of these products hereby expressly assume all risks associated with any such modifications and use. North West Toy’s, LLC also recommends strongly that all products be installed by trained professionals only. Please contact us prior to returning products. Since each vehicle is a custom build some parts we sell may need to be trimmed, or slightly modified to fit your vehicle. You are the final builder of your vehicle. Once a part has been modified it can’t be returned.
Please read our warranties/conditions page prior to purchase. You are the builder and end user of your vehicle and any product you buy. We are not liable for any and all issues, problems, or liabilities associated with their use. If you don’t agree with the warranties and conditions please don’t buy our products
Tools Required3/8 drive ratchet
Multiple ratchet extensions
12 mm socket
14 mm socket
17 mm socket
19 mm deep socket
Angle grinder with cut off wheel
12mm thread tap
Drill
3/16” drill bit
Rubber mallet
Items still needed but not suppliedLoctite
Isopropyl alcohol
Rags
3vz flywheel bolts- New bolts can be ordered thru us if needed
Pressure plate bolts- New bolts can be ordered thru us if needed
Block to bell housing lower inspection plate
Thick washer ½”
Installation of Flywheel
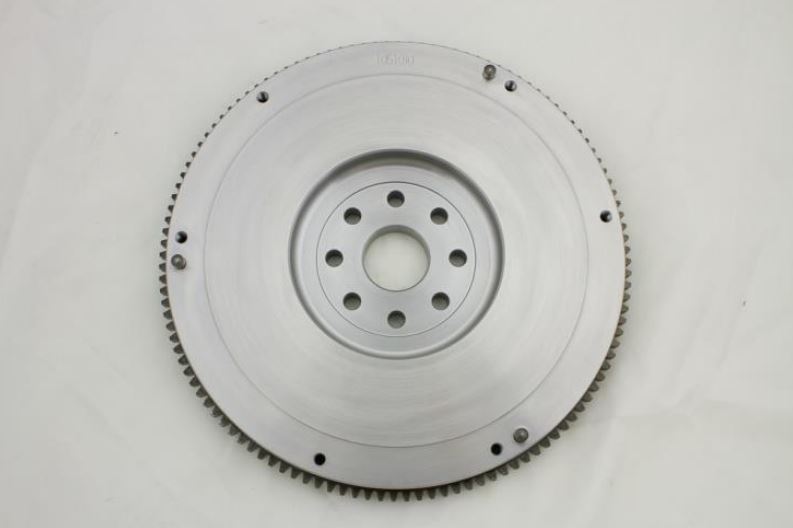
Always make sure to disconnect the negative battery prior to working on your vehicle. Remove the old flex plate from the crank. There should be 8 14mm bolts that need to be removed. Once removed, the flex plate bolts can be disposed of. With the flex plate removed there is a spacer that is behind the flex plate. The spacer can be removed and disposed of as well.
At this time check to see if the rear main seal is leaking oil. If, so replace with a new rear main seal.
The new flywheel is coated in pickling oil and can be slick, so be careful as to not drop the flywheel. Place the flywheel on the end of the crank. The flywheel is designed to be a tight fit over the crank shaft so it most likely won’t be able to be pressed on by hand. With the flywheel sitting on the end of crank install 2 3vz flywheel bolts and use them to press the flywheel onto the crank. With the flywheel pressed all the way on the crank you can back the 2 bolts back out.
Check the 1uz starter for proper engagement on the ring gear. The starter gear should engage the ring gear about ½ way into the ring gear.
With the flywheel now installed it’s time to install the Loctite onto the threads of the flywheel bolts.
Then torque in a star pattern to 65 foot lbs.

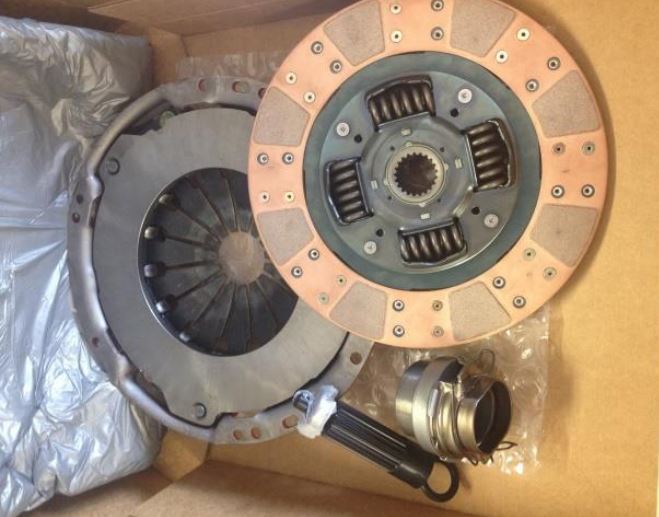
Installation of Clutch kitAlways disconnect negative battery cable prior to doing any major work on your vehicle. When removing your old clutch, note which way the clutch disc was facing (spring pack facing engine or transmission). You will want to install the new disc with the same orientation as the old disc you removed. Before installing your new clutch clean the inner bellhousing area to make sure no debris gets onto the new clutch. Also inspect clutch bar for any damage (cracks, excessive wear etc…). Install new pilot bearing in crankshaft. Failure to replace pilot bearing can result in annoying squeal noises when cold. We supply a new pilot bearing in all of our clutch kits. Place clutch disc on flywheel, using the supplied alignment tool to make installation of the transmission easier. For V6 clutches, the spring side faces the flywheel. If there is any confusion refer back to which way the stock disc was facing. Install pressure plate onto flywheel, making sure to align the dowel pins in the flywheel with the corresponding holes in the pressure plate. Verify that the alignment tool keeps the clutch disk centered in the assembly (do not let the tool just hang on its own, you need to keep it centered as you install the pressure plate. Torque bolts evenly a little at a time in a star pattern. If the pressure plate is not torqued evenly in steps it can cause the plate to warp, this will not be covered under warranty. North West Toy’s llc recommends tightening the pressure plate with hand tools only. Refer to chart below for torque specs. Remove alignment tool. Replace throw-out bearing. The throw-out bearing is held in with two retaining clips that hold it to the clutch fork. Lubricate all moving parts; input shaft, pressure plate “finger” tips, throw out bearing contact surfaces etc… with white lithium grease or Anti-sieze. This will ensure smooth performance and engagement of the clutch. 11. With the new throw out bearing in place, slide the transmission onto the engine, being extremely careful not to let the weight of the transmission hang on the clutch disk. This can cause serious damage to the disk. With the clutch disk properly aligned during installation, the input shaft should not require any force to install. Rocking the transmission or turning the output shaft as you install the tranny may help if it doesn’t go in all the way. DO NOT USE THE BELLHOUSING BOLTS TO DRAW THE TRANSMISSION AND ENGINE TOGETHER! This can result in serious damage, especially to the new clutch or the thrust bearings inside the engine, and should not be necessary if everything is installed and aligned properly. Re-install slave cylinder and other components you may have removed to gain access to the clutch. If needed, bleed clutch hydraulic system according to repair manual. Road test the vehicle, and avoiding aggressive driving for the first 500-750 miles. Proper break-in procedure is crucial to long service life out of your new clutch.
Torque Specifications
3VZ Flywheel Torque 65 FT-LBS star pattern
3VZ Pressure Plate Torque 11-15 FT- LBS star pattern

Installation of Bell housingOur bell housings are designed to connect a 1uz block bolt pattern to the R150F manual 5 speed transmission found behind the Toyota 3.0 and 3.4 V6 trucks and 4runners. The bell housing is manufactured with 2 predrilled and tapped holes for a slave cylinder. We have found that not all slave cylinders are aligned in the same way to this area so this is now oversized so you as the builder can custom cut, drill, and tap the holes you may need for proper slave cylinder alignment. Having to cut and re-drill these 2 holes is considered normal and not cause for alarm.
With the transmission sitting on the transmission jack remove the throw out bearing and fork. Next remove the 9 bolts that hold the bell housing onto the transmission. There are 2 dowel pins that locate the bell to the tranny so a small amount of pressure can sometimes be required to separate the bell from the case.
Now that the tranny is bell free it’s time to place the 1uz bell on the tranny. Make sure to line the dowel pins into the new bell and install bolts to secure the bell to the transmission. Install the new pivot ball or reuse your old pivot ball, install thick washer underneath the pivot ball. Install the clutch fork and throw out bearing. Install the tranny on to the motor. This will place the clutch fork in its resting position and under riding tension from the clutch pack. Place the slave cylinder up at its mounting location and push the slave rod into the slave as far as possible. This is the riding position of the slave. Mark inside the mounting holes with a sharpie. Remove the transmission from the rig.
Remove the fork and throw out bearing from tranny. Now using a drill and 3/16” drill bit, drill out the holes that you marked with the sharpie for the slave mounting location. Now use a cutoff grinder to remove the necessary material to put the slave mount in the correct location to work with your clutch fork. Once the necessary material has been removed install the fork and throw out bearing back on the transmission. Using your tap re-tap the new holes you have.
Now it’s time to place the tranny back up against the motor and tighten all bolts to hold the tranny to the engine. Once the transmission has been installed you can secure the slave cylinder back in its location. The drive train is now installed.